Guides · October 21, 2026 · 11 min read
From Raw Clips to Finished Post: How to Edit Videos in the Whistlr App, Now Open to Everyone
How to edit videos in the Whistlr app: timeline cuts, beat sync, auto captions, effects, speed curves, keyframes and chroma key, free for every account.
Editing a video in the Whistlr app happens right inside the posting flow. Begin a post, shoot with the Whistlr camera or choose footage from your gallery, and the editor loads with your clip already on a multi-track timeline. Trim and split, lay in a song and snap your cuts to its beat, narrate over the top, generate captions automatically, stack text, stickers, photos and extra video on top, then finish with filters and effects. Speed ramps, keyframes, freeze frames and green-screen keying are there for bigger ideas. Tap Next, write your caption while the final file is prepared behind the scenes, and share.
As of this release, that full editor belongs to every account. No Creator account, minimum audience or paid plan is required; anyone who can post video gets exactly the toolkit our busiest creators work with. Consider this the hands-on manual: where each control sits, what it's good for, what keeps your work from vanishing mid-edit, and the routines that help a stack of rough takes become something people watch all the way through.
What the Whistlr video editor offers now
Longtime readers have seen this tool evolve in stages. Since its first appearance, the in-app editor was reconstructed around a brand-new timeline, put in the hands of early testers and adjusted nearly every day based on what they reported. The version arriving for everyone is that rebuilt one.
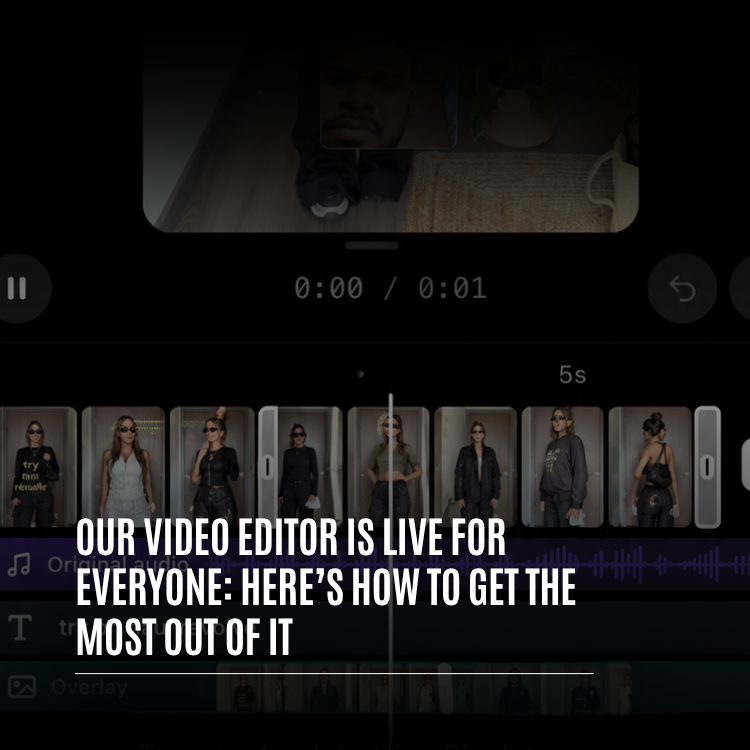
Depth is the headline. Main footage sits along the bottom as a filmstrip, and stacked above it are dedicated lanes for the original sound, music, narration, text and overlays. Anything you drag lines up with the playhead and with neighboring items. Pick a clip and the toolbar changes to match it. And when a straight cut won't do, ramps, keyframes and keying are a tap away.
A first-time poster and a full-time creator should open the exact same timeline. The ideas are what should set their videos apart, not the tools.
— The Creator Studio team
Where the editor lives
You won't find a separate app or a setting to enable. Start any new post, capture or select video, and the editor appears. The plus button pulls in additional clips from either the camera or your gallery and adds them to the main row. All your clips combined can total as much as 10 minutes, so building a longer piece from lots of short takes works fine. Go past that and the editor flags it, giving you a chance to tighten things up before posting.
How the Whistlr video editor screen is organized
Think of the screen as three stacked layers: a preview at the top, the timeline in the middle and a toolbar along the bottom.
Preview and transport
The preview is an honest picture of the final post, captions, overlays, filters and effects included. Beneath it, a transport bar holds play and pause, your position against the total running time, plus undo and redo. Text and stickers can be dragged around right on the preview, and a guide appears as they snap to the frame's center lines, so centering a title is a single gesture.
Timeline lanes
A ruler spans the top of the timeline, and a white playhead cuts through every lane so you always know which instant you're on. Each kind of material has its own lane:
| Lane | Holds | Typical jobs |
|---|---|---|
| Main row | Your core footage, shown as a filmstrip | Trimming, splitting, ordering, transitions |
| Original audio | Sound captured with the clips | Lowering, muting, cleaning up |
| Music | The track you chose, marked with beat dots | Choosing a section, cutting on the beat |
| Voiceover | Narration recorded over the video | Recording, retaking, keeping the best take |
| Text and stickers | Titles, captions, emoji, stickers | Positioning and timing each item |
| Overlay | Images and video placed above the main row | Layering, with a maximum of three video rows overall |
Pinch to zoom: in for single-frame precision, out to see the overall shape of your edit. Dragging or trimming anything makes its edges catch on the playhead and on neighbors with a small haptic tick, so a caption lands on a cut almost by itself.
Toolbar
When nothing is selected, the toolbar shows the general tools, among them Text, Sticker, Audio, Effects, Filters, Captions, Voiceover, Speed, Transitions, Draw and Crop. Select a clip and it swaps to clip-level actions such as Split, Delete, Enhance audio, Cut silences, Extract audio, Duplicate and Replace. The back arrow returns you to the general set.
How to cut, trim and arrange clips on Whistlr
Good videos start with tidy cuts. These are the fundamentals, sized for a thumb rather than a mouse:
- Trimming: pull the handle on either end of a clip. A handle only moves with an intentional drag, so scrolling past it won't nibble off footage.
- Splitting: park the playhead where you want the break and tap Split. You now have two independent pieces to shorten, move, remove or style separately.
- Reordering: long-press anything on the main row. The timeline folds into square tiles you can slide around, and releasing unfolds them in their new sequence with no gaps left behind.
Transitions
Tap the join between two clips to choose from fourteen transitions in four families:
| Family | Options | Feels like |
|---|---|---|
| Basic | Dissolve, Fade black, Fade white, Blur | Gentle scene changes |
| Motion | Four directional slides plus Wipe | One shot pushing the next off screen |
| Camera | Zoom in, Zoom out, Spin | The lens itself moving |
| Effects | Flash, Glitch | A punchy reveal or a beat drop |
Sync to beat
With a song in place, Sync to beat shifts the cuts on your main row so each lands on a beat. It only shortens clips, never restores footage you removed, and leaves no gaps. For montages, it's the quickest route to an edit that feels choreographed to the music.
How to add music, voiceover and cleaner sound
People forgive shaky footage far sooner than bad audio, so the editor gives sound real attention.
Music, levels and narration
Pick a track in Audio, then tap Edit to choose precisely which stretch plays. Beat dots along the music lane let you eyeball where cuts should go. Volume gives every sound source, from the clip's own audio to the song and your narration, a dedicated slider and mute switch, which makes ducking music under speech a few-second job.
For narration, open Voiceover and press the large record button. Recording begins from wherever the playhead is while the video plays, so you can respond to what's on screen in real time. A red lane extends under the playhead as you talk. Stop, listen back alongside the video, record again if needed, or tap Done to keep it.
Voice effects and text to speech
Voice effects reshape a voice on one clip or across the whole piece. Choices include Announcer, a deep broadcast sound; Helium; Giant; Vocalist, which adds tuned, doubled vocals; Robot; and Echo. Prefer not to narrate yourself? Select a text item and tap Text to speech. A voice reads it aloud, dropping an audio clip exactly where that text begins, at Slow, Normal or Fast pace.
Enhance audio and Cut silences
- Enhance audio: a single tap tames background noise and room echo, shapes the voice and levels the volume. Adjust the strength slider to taste, or apply it across every clip.
- Cut silences: the editor detects pauses and removes them. Light preserves natural breathing room, Medium tightens the pace, and Tight suits rapid-fire talking videos. Each removal is a normal split you can still adjust, and undoing the whole operation takes one tap.
How to add automatic captions, text and stickers
Captions let people follow along with the sound off and open your video to a wider audience. The Captions tool writes them for you from the speech in your footage.
Auto captions
Open Captions and either let it auto-detect the language or choose one yourself. Timed captions appear on their own lane. Dress them up with presets and word-by-word animations like Highlight, Pop, Bounce, Box, Rise, Reveal and Type, where each word reacts as it's spoken. Then set the density and placement:
| Density | On screen at once | Suits |
|---|---|---|
| Punchy | One to three words | Fast, high-energy edits |
| Balanced | A short line | Most everyday videos |
| Full | Up to two lines | Calm explainers |
Size is adjustable, and captions can sit at the top, middle or bottom of the frame. Everything remains editable: open the line list, tap a line to jump there, tap again to correct a word. Timing follows your cuts, so highlights stay in sync even after you rearrange things.
Animated titles, stickers, images and doodles
Add a headline or hook, choose a font and style, then give it an entrance, a loop or an exit. The animation menu spans Typewriter, Word by word, Fade, Slide, Pop, Bounce, Rise, Wave, Blur, Zoom, Neon and Glitch. Each text item is its own timeline clip, so you decide when it appears and for how long. Stickers and emoji behave identically. Photo layers a still image over your footage, and Draw lets you sketch on the frame with assorted brushes, sizes and colors that stay crisp at full resolution.
How to use filters, Adjust and effects on a Whistlr video
Once the cut works, the look pulls it together. You have three layers to play with, plus Crop for reframing a shot without filming it again.
- Filters: the same set found in the Whistlr camera, displayed as round previews of the current frame, each with a strength slider. Apply to one clip or the entire video.
- Adjust: per-clip control over Brightness, Contrast, Highlights, Shadows, Warmth, Saturation, Structure, Fade, Sharpen, Grain and Vignette.
- Effects: seventeen visual effects that start at the playhead and trim like any clip.
| Effect group | Effects | Good for |
|---|---|---|
| Magic | Sparkle, Confetti, Hearts, Snow | Celebrations and cozy moments |
| Retro | RGB split, VHS, Glitch, Film grain, Old TV | Throwback and nostalgic looks |
| Light | Flash, Light leak, Bokeh | Warm, dreamy transitions |
| Motion | Shake, Zoom pulse, Blur in, Blur out, Echo | Energy on a beat or impact |
Since effects are timeline items, you can confine a Zoom pulse to a single beat or let Snow fall over just one scene instead of coating the whole video.
Pro tools: speed ramps, keyframes, freeze frames and chroma key
Some edits need more than a cut and a color grade. These are the tools that once required desktop software.
Speed and curves
Constant speed runs anywhere from 0.3x to 4x, with or without the original sound. Curve lets the pace change within a clip, using presets such as Montage, Hero, Bullet, Jump cut, Flash in and Flash out, or a Custom curve you shape yourself. A Hero ramp that slows right at the key moment is an easy way to make an ordinary clip feel like a film.
Keyframes
Keyframes animate text, stickers and overlays. Set position, scale, rotation and opacity at one point in time, set them differently at another, and the editor glides between the two. Slide a label beside a product, swell a sticker on the punchline or float a picture-in-picture across the screen.
Freeze and reverse
Freeze grabs the frame under the playhead and holds it for between 0.8 and 10 seconds, pushing everything after it later. The still acts like a normal clip, ready for a transition, text or effect. Reverse runs a clip backward, great for pours, jumps and throws that look better rewound.
Chroma key and overlay rows
Chroma key knocks out one color from an overlay clip. Sample it with the eyedropper on the preview, adjust the strength and decide whether to preserve soft shadows, and your green-screen footage sits convincingly over whatever is below. Overlays can stack on as many as three video rows. Row up and Row down change the stacking order, and Unify collapses every row into the main one whenever a plain sequence suits you better.
How the editor keeps your work safe
Nobody experiments freely if a stray tap or an incoming call might erase twenty minutes of effort. These safeguards are there so you don't have to edit cautiously:
- Fifty steps of undo and redo, so you can test an idea and back out of it.
- Recovery drafts kick in as soon as you make a meaningful change. If Whistlr closes unexpectedly, it offers to restore your edit next launch.
- Your final video is prepared while you type the caption, and if you hop to another app or the phone pauses the process, it carries on when you return.
- Only a complete, finished file ever gets posted.
- What you see in the preview is what posts, down to the exact frame a keyframe hits.
How to edit your first video on Whistlr, step by step
Brand new to editing? This sequence gets you from raw footage to a post in a few minutes. Layer in other tools as you get more comfortable.
- Start a post, then record or select footage. Add extra clips with the plus button.
- Trim slow openings and awkward endings with the handles; use Split to remove anything in the middle.
- Long-press and drag to put the clips in the right order.
- Choose a song in Audio, tap Edit to select the section, then tap Sync to beat.
- Open Captions, let it auto-detect, pick a style and scan the line list for mistakes.
- Place animated text over the opening second as a hook.
- In Volume, bring the music down beneath your voice, and try Enhance audio if the room was loud.
- Add a filter, then fine-tune Brightness or Warmth in Adjust on any clip that looks off.
- Watch from the start once and trim whatever drags.
- Tap Next, write the caption while the file finishes, and post.
Habits that lift an edit
- Caption before polishing. Seeing your words on screen exposes slow spots fast.
- Open strong. Viewers decide within a second, so lead with the best moment or a bold line.
- For montages, rough-trim and let Sync to beat do the precise cutting.
- Match caption density to tempo: Punchy for energy, Full for calm.
- Cut silences on talking videos. Creators say it shaves real time off every edit, and fashion creators lean on the Hero ramp for outfit changes.
Frequently asked questions
Do I need to pay to use the Whistlr video editor?
No. The complete editor comes with every account, right inside the posting flow. You don't need a Creator account, a minimum following or a subscription, and the pro tools are included.
What's the maximum video length in the Whistlr editor?
Your clips can add up to 10 minutes in total. Run longer and the editor warns you so you can trim before sharing.
Can Whistlr caption my videos automatically?
Yes. Open Captions, choose a language or let it auto-detect, and timed captions are generated on their own lane. Pick a style and a density of Punchy, Balanced or Full, then tap a line to correct any word.
How do I line up my cuts with a song in Whistlr?
Choose a track in Audio, select the section you want with Edit, and tap Sync to beat. Your cuts move onto the beats without leaving gaps or bringing back trimmed footage.
Will I lose my edit if Whistlr crashes?
Unlikely. Once you've made a meaningful change, a recovery draft is kept, and reopening the app after an unexpected shutdown offers to restore it. You also get 50 undo steps as you work.